The Deathclaw's Revival

3D Printing Log #3

Owning Scale Instead of Guessing It

This third batch of prints was run on the same machine, at the same place, under the same constraints as the previous two logs: the Ultimaker at the Millennium Library.

Nothing about the environment changed.

The printer didn’t get better.
The staff didn’t change their rules.
The time limits stayed exactly the same.

What changed this time was how much responsibility I took before the files ever hit the printer.

After Log #2, it was clear that print quality wasn’t the main bottleneck anymore. Settings were working. Approvals were going through. The real weak point was upstream — how STL files carry scale, orientation, and assumptions that don’t show up until someone else is forced to interpret them.

This batch was about removing that ambiguity.

The Third Batch Submission

For this round, I submitted five requests total:

  • Three Gridfinity 4×4 frames

  • One flat dungeon wall

  • One Fallout 4 Deathclaw miniature

The Gridfinity frames and the dungeon wall were intentionally unchanged from Log #2. Same files. Same print settings. Same expectations. They were there to confirm consistency, not to experiment.

The Deathclaw was the variable.

In the previous log, that model had been denied — not because it was too complex or too large, but because my instructions were doing too much interpretation work instead of the file itself. I was describing how I wanted it to be scaled instead of sending a file that already was.

This time, the goal was simple:

  • Send an STL that already tells the truth

  • Remove scale discussions entirely

  • Let the print settings speak for themselves

The submission went through without questions or pushback. At that point, all that was left to do was wait for pickup and see if the changes actually held up in the real world.

Blender Wasn’t the Goal — Clarity Was

A few weeks before submitting this batch, I started learning Blender. Not because I wanted to sculpt, kitbash, or make original models — but because I kept running into the same problem over and over again:

I didn’t actually know what size my STL files were.

I followed a long beginner tutorial on YouTube — the classic donut track. I’m not done with it yet. I’ve watched it about one and a half times so far, and I’ve almost finished my first donut. That was enough to get comfortable moving around the viewport, importing files, and not feeling completely lost. 

What surprised me was realizing that Blender could import STL files directly.

That was the missing link.

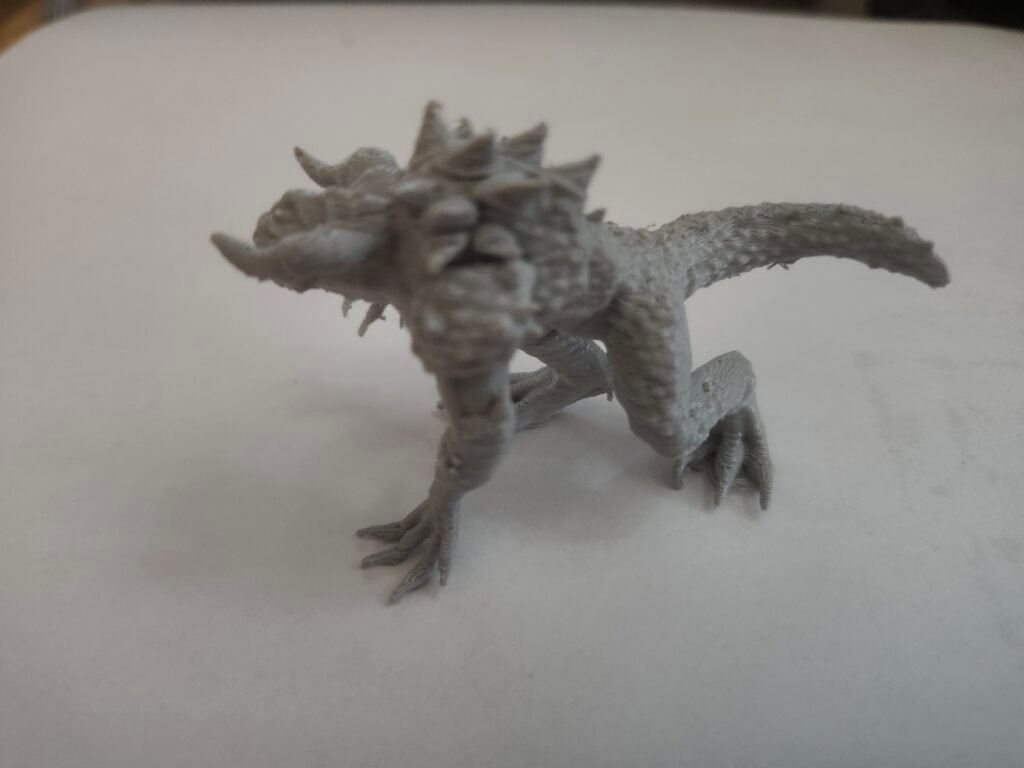
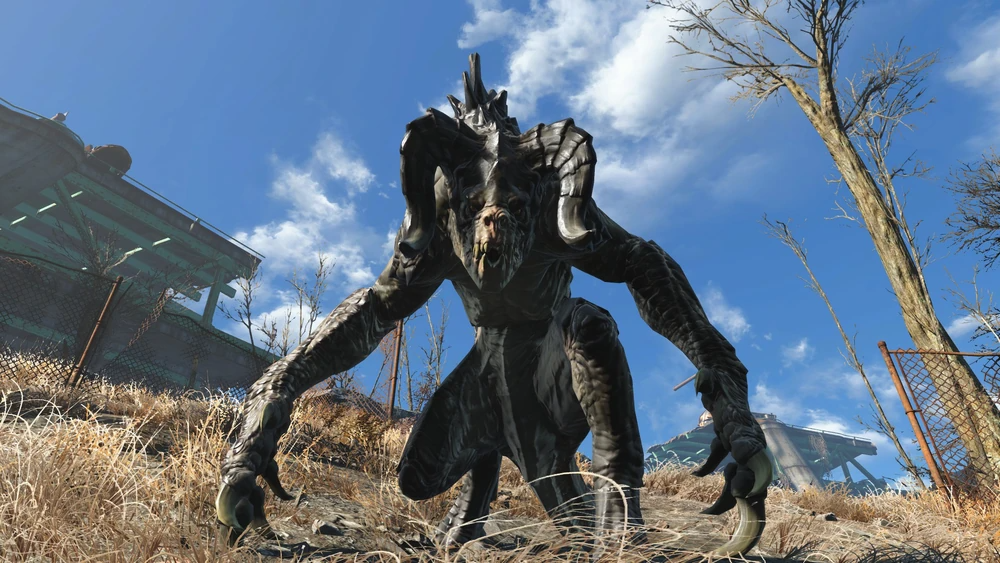
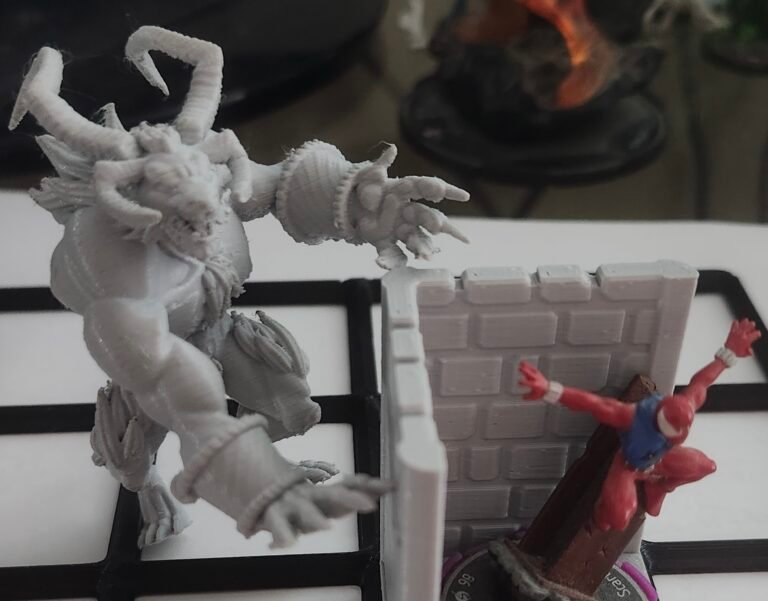
In Log #2, the Deathclaw didn’t fail because of geometry or print difficulty. It failed because the STL already had scale baked into it, and I was trying to override that downstream with instructions. I was arguing with the file instead of inspecting it.

So instead of guessing again, I decided to look at the problem head-on.


Using a Known-Good Print as a Reference

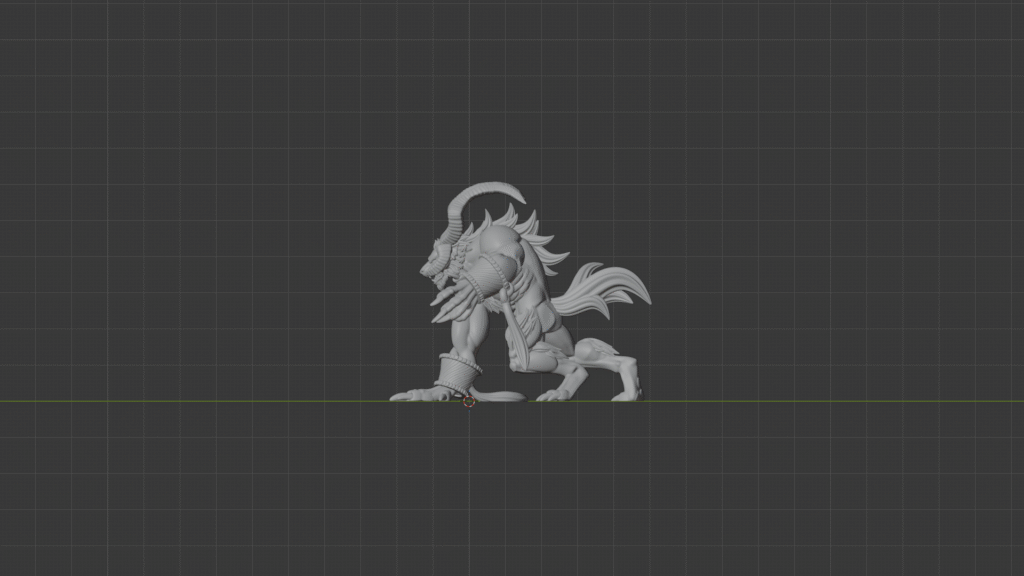
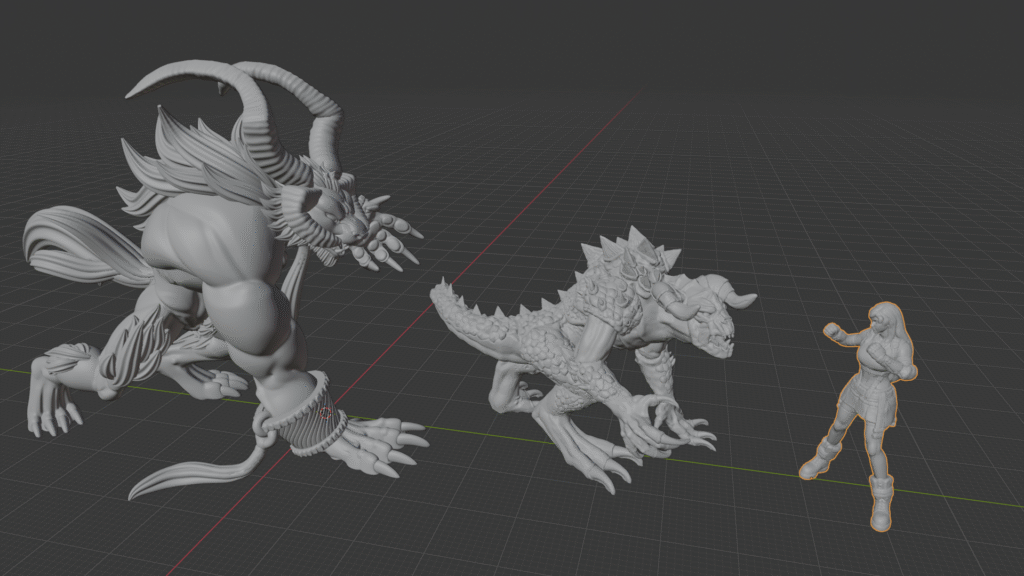
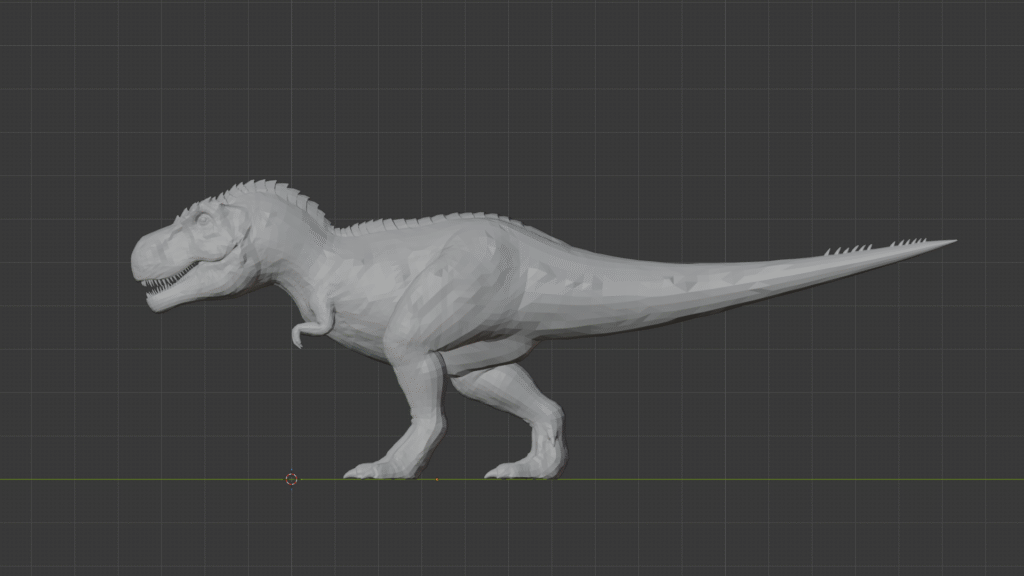
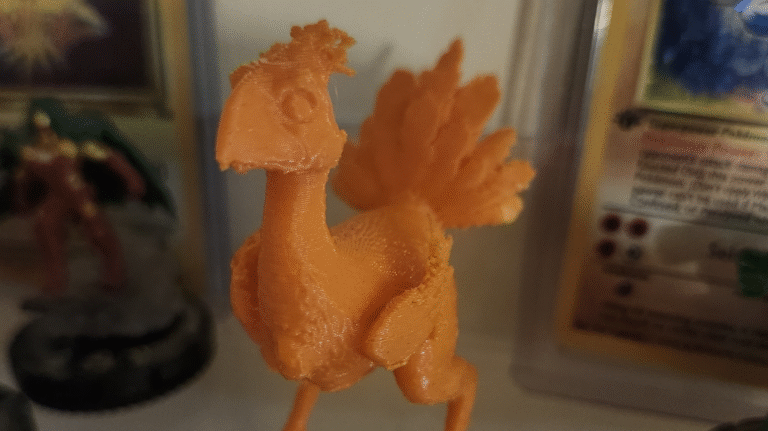
The first thing I did was import the Ifrit STL — the one that had already printed successfully at the correct tabletop scale. That model was proven. Approved, printed, handled, and visually right.

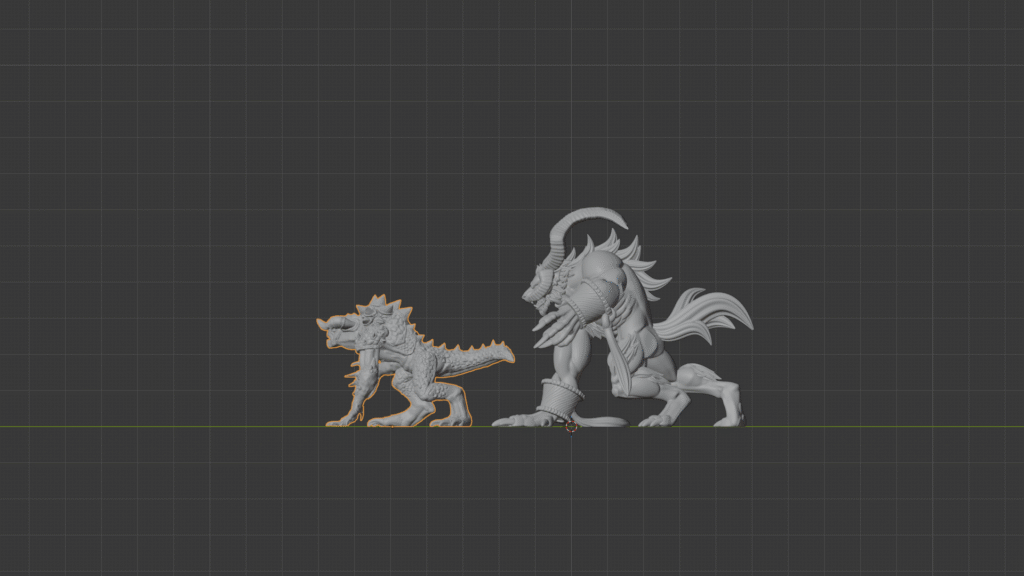
Then I imported the Deathclaw STL into the same Blender scene.

That one move changed everything.

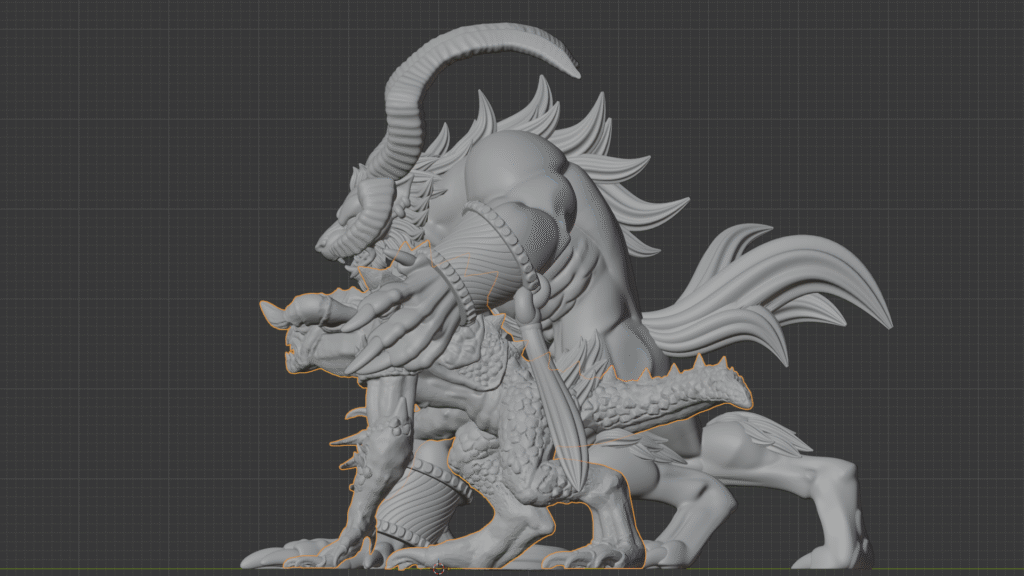
Instead of thinking in percentages, millimeters, or “hero scale” as an abstract idea, I could now see both models occupying the same space. Same grid. Same camera. Same units.

The scale problem stopped being theoretical.

Once the Deathclaw was roughly where I thought it should be relative to Ifrit, I committed to it. I applied the scale using Ctrl + A → Scale, which effectively locked those dimensions in. From that point on, the model wasn’t “scaled up” or “scaled down” anymore — it just was that size.

That alone eliminated a lot of ambiguity.

But it also exposed a new set of problems I didn’t know I had.


Discovering the Hidden Geometry Issues

As I started looking more closely, I noticed something that explained a lot of the weirdness I’d been fighting before.

The Deathclaw’s origin wasn’t centered the way I expected. The model’s “center” — the point slicers and transforms care about — was offset toward the front-right of the miniature. That made rotations feel wrong, scaling feel unpredictable, and orientation harder than it needed to be.

I tried the usual beginner moves first:

  • Rotating it

  • Eyeballing alignment

  • Nudging it around until it “looked right”

None of that felt reliable.

That’s when I started digging into parts of Blender the donut tutorial hadn’t reached yet — things like setting the origin deliberately, using the 3D cursor, and lining models up against the world axes instead of my own judgment.

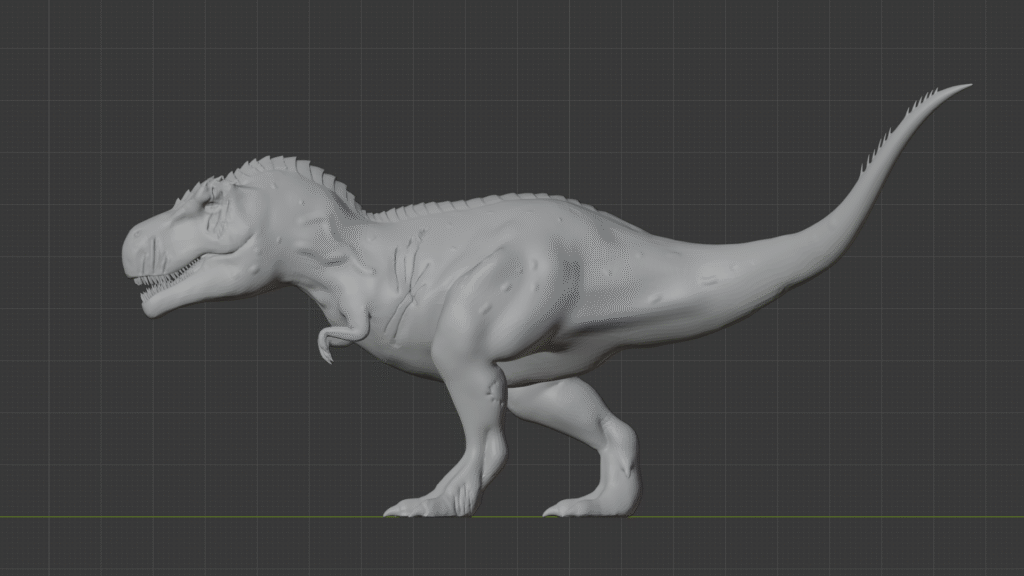
Once the origin was set properly and the model was oriented in a way that made sense, the file stopped fighting me.

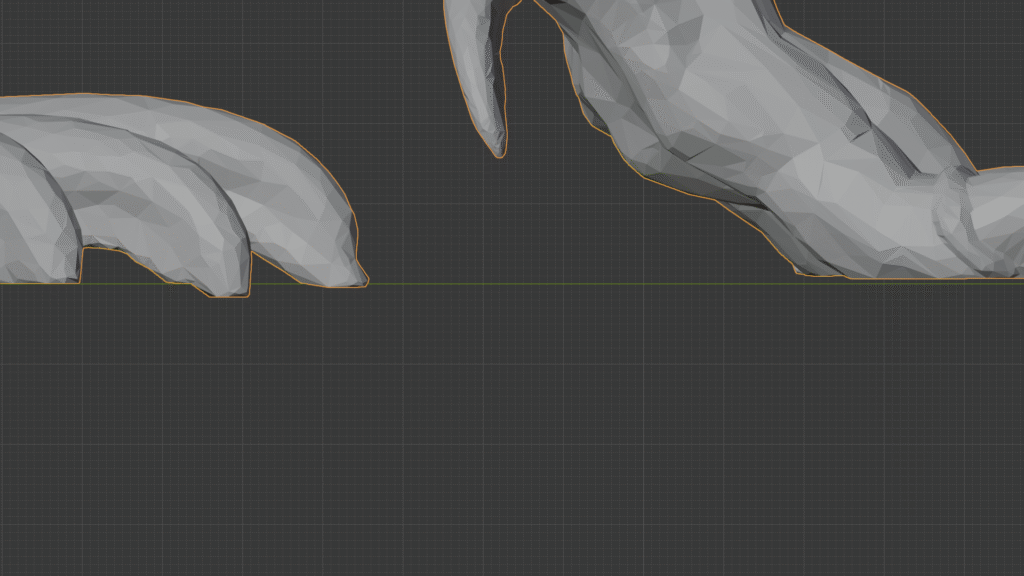
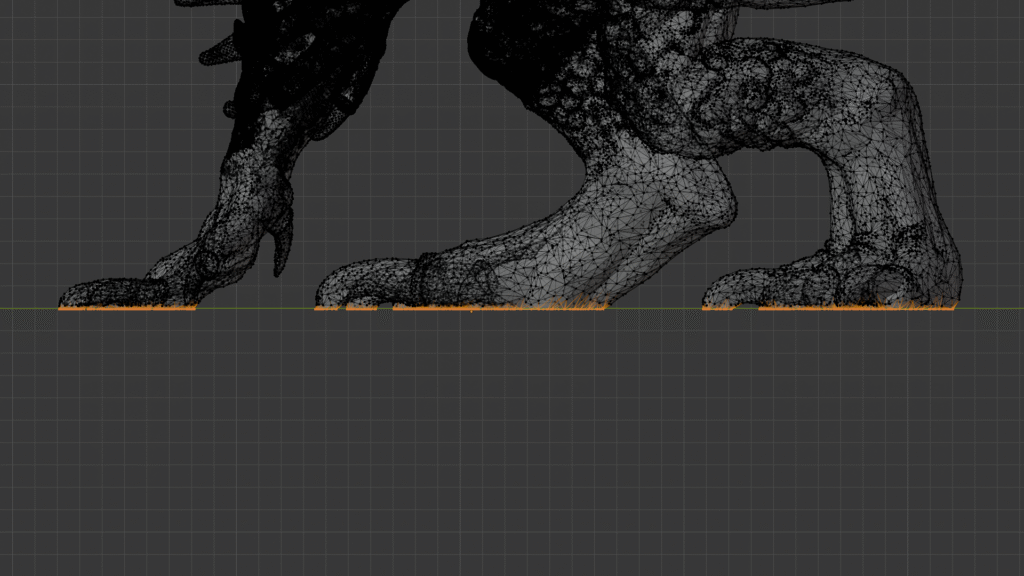
But there was still one last issue — and this one only became obvious because I was thinking about the physical print, not the screen model.

Making the Model Sit Flat (Before Printing)

Once the Deathclaw was scaled correctly and the origin was behaving, I ran into a problem I hadn’t fully appreciated before:
the model didn’t actually sit flat.

On screen, it looked fine. In perspective view, nothing jumped out as obviously wrong. But when I started thinking about how it would touch the build plate — and later, how it would sit on a table — it was clear this could turn into a wobble problem.

At first, I did what I’d been doing up to that point:

  • Rotated the model slightly

  • Eyeballed the feet and hands

  • Nudged things until they looked level

None of that felt solid. Every adjustment was subjective, and I knew that meant I was one tweak away from undoing something else.

So instead of guessing, I went looking for a tool-level solution.


Flattening the Contact Geometry

What finally clicked was realizing I didn’t need to rotate the whole model at all. I needed to make the lowest points of contact tell the truth.

In side view, I selected all the vertices that extended below the plane where I wanted the model to rest. Then I used a simple operation:

  • Scale → Z → 0

That flattened every selected vertex onto the same plane.

No eyeballing.
No micro-rotations.
No “close enough.”

Once that was done, the Deathclaw’s feet and contact points were perfectly aligned. The model had a clean, unambiguous bottom. It wasn’t just visually upright — it was geometrically honest.

That moment felt big.

This wasn’t something I could fix after printing with sanding or filler without compromising detail. This was something that had to be solved in the file, upstream, before the printer ever got involved.


Locking the Result

After that, I double-checked everything:

  • Scale already applied

  • Origin centered and intentional

  • Orientation aligned to the world axes

  • Contact points flattened

Only then did I export the STL.

At that point, the file wasn’t a suggestion anymore. It was a decision. Anyone opening it — including library staff — would see exactly one reasonable way for it to exist in the real world.

And that was the whole goal.

It's very subtle. But that green line represents the printer bed, and if the model sits above and below that line at the same time it will make it wobble on flat surfaces when it's done.
God send technique haha. It actually took a long time for me to discover this. The struggle was real lol.
Tifa has been scaled to 30mm tall. I use her for reference as well sometimes.

Submission, Pickup, and the Moment of Truth

Once the Deathclaw STL was exported, I sent it to the library the same way I had with the successful prints in Log #2.

No scale explanations.
No “hero scale” language.
No instructions asking them to resize anything.

Just:

  • A pre-scaled STL

  • Known-good print settings

  • Nothing left to interpret

The submission went through without questions or pushback. No denial. No request for clarification. At that point, all I could do was wait and see if the file actually held up outside Blender.

When I went to pick everything up, all five pieces were there.

Originally engineered from scientific experiments conducted by the United States government to develop a cheap, cost-effective replacement for human troops during heavy-duty combat operations, the creature which came to be called The "Deathclaw" was the result of a genetic mix of various animal species, with the primary test subject being Jackson's chameleons. Although the project was successful in creating a ferocious predator capable of surviving and thriving on its own in nearly any environment, to date there has been no official sources confirming that the government carried out their original goal of deploying the deathclaws into military combat prior to 2077.

The Results in Hand

The three Gridfinity 4×4 frames turned out exactly as expected — clean, square, and consistent with the previous batch. That confirmed nothing had drifted on the settings or the printer side.

The flat dungeon wall matched the quality from Log #2 as well. No surprises there, which was the point.

The real test was the Deathclaw.

It printed cleanly, sat flat on the table without any wobble, and immediately read correctly as a tabletop miniature. No rocking. No weird stance issues. No post-print fixes needed.

What surprised me was the footprint.

Going in, I expected it to land as a 2×2 base character. In hand, it fits perfectly as a 2×1 base instead. Big, imposing, but not oversized — the pose carries the mass without demanding extra space.

That was a good reminder that visual bulk and physical footprint aren’t the same thing. The file didn’t just scale correctly — it translated correctly into the real world.

That’s not something I could’ve confirmed on screen.

A Deathclaw next to Lockjaw lol. Perfect 2x1 size example

Validation from the Other Side of the Counter

While I was picking everything up, one of the staff members recognized my name and mentioned they’d been enjoying the print settings I’d been sending in.

Specifically, they said it made things easier on their end.

That was good to hear — not as praise, but as confirmation that the changes I’d made in Log #2 and this log were actually reducing friction for the people running the printer.

Clear files and clear settings weren’t just helping my prints succeed. They were helping the system run smoother.

Arrays, Copies, and How the Library Staff Thinks About the Risk

During that same conversation, I mentioned that for a future batch I’d created arrays in Blender for terrain pieces — multiple walls laid out in one file.

Their reaction was hesitant.

They explained that they’ve seen unstable arrays fail mid-print before, and when that happens, everything on the plate fails with it. From their perspective, arrays concentrate risk.

What they prefer instead is simpler:

  • One STL

  • A note saying “please make X copies”

That’s when I learned something important.

The five-request limit isn’t five total prints — it’s five different models. The library can make multiple copies of the same model without it counting against that limit.

That completely reframed how I should be preparing files for this environment.

From their side, it makes sense:

  • One model printed nine times is nine chances to succeed

  • One array printing nine parts is one chance to fail catastrophically

They optimize for success rate, not efficiency.


Reframing the Array Detour

I spent a good chunk of time learning how to build arrays in Blender, so hearing this initially felt like a step backward. But it isn’t.

Learning how arrays work wasn’t wasted effort. It taught me:

  • How duplication behaves in real space

  • Where instability can creep in

  • When not to use a powerful tool

That’s become a pattern with this whole process.

Every time I’ve slowed down and aligned myself with how the system actually works — the printer, the staff, the file formats — things have gone better. Every time I tried to outsmart it, something broke.

Just a visual example of what an "Array" is.
Another Example

What Actually Changed in This Log

Compared to Log #2, nothing about the printer improved.

The same machine ran these prints.
The same time limits applied.
The same approval process was in place.

What changed was where the work happened.

In Log #2, better slicer settings reduced friction and failure. In Log #3, the focus moved upstream — into the STL itself. Scale, orientation, contact geometry, and origin were all handled before submission, instead of being described in notes and hoping someone else interpreted them the same way I did.

The difference showed up clearly in the results:

  • No denials

  • No clarification requests

  • No post-print fixes

  • No wobble

The Deathclaw didn’t just print — it translated correctly from screen to table.


What’s Now Under My Control

After this batch, there are several things I’m no longer guessing at:

  • Scale is owned, not inferred

  • Orientation is intentional, not assumed

  • Contact surfaces are fixed in the file, not patched after

  • Origins and centers are set deliberately

  • Submissions require less interpretation by staff

Just as importantly, I now understand more about how the library actually evaluates risk:

  • Why arrays make them nervous

  • Why multiple copies of one STL are safer than one crowded plate

  • Why clarity matters as much as efficiency in shared print environments

None of that came from slicer menus or tutorials. It came from failed submissions, conversations at pickup, and adjusting how I work to fit the system I’m using.

Where This Leads Next

At this point, I’m no longer just preparing files so they’ll survive the library printer. I’m starting to push on what kind of files I can reasonably send through a shared system like this — and where the next set of constraints live.

My next batch reflects that shift.

I’ve submitted four terrain array files and am currently waiting to hear whether they’re approved. After talking with staff about how arrays concentrate risk, this feels like a real test of whether the tradeoff is worth it in a public print environment.

Alongside that, I’ve been working on a T-rex miniature that started out surprisingly bland. Instead of accepting it as-is, I took it into Blender and began modifying it directly — not just to fit the library’s dimension limits, but to keep the scale I wanted while making the model more physically resilient.

That meant:

  • Adjusting proportions instead of just resizing

  • Adding scar markings, muscle definition, and surface variation

  • Sculpting skin blemishes and texture

  • Inflating small details so they wouldn’t snap off during support removal

Partway through that process, I ran into another constraint I hadn’t considered before: file size. The library has a 100 MB upload limit per file, which forced me to decimate geometry and think about where detail actually matters — and where it doesn’t.

That T-rex turned into a real learning curve, and it pushed me well beyond basic STL prep and into deliberate sculpting, optimization, and tradeoffs.

That work — and whether the arrays survive — will be the focus of 3D Printing Log #4.

The printer still hasn’t changed.
The constraints keep revealing themselves.
And the work keeps moving upstream.

The original T-Rex STL features a low-resolution mesh with visible polygonal surfaces, a neutral pose, and minimal anatomical definition. Surface detail is sparse, resulting in flat skin textures and limited character expression.
The revised T-Rex STL has been fully reworked using Blender sculpting tools, with increased mesh resolution, enhanced muscle definition, added veins, scars, and skin blemishes, and a reposed tail to improve print-bed compatibility. The higher polygon density produces a smoother, more natural surface suitable for detailed 3D printing.
Share your love

Newsletter Updates

Enter your email address below and subscribe to our newsletter

Leave a Reply

Your email address will not be published. Required fields are marked *